Low-Temp Pasta

Low-Temp Pasta
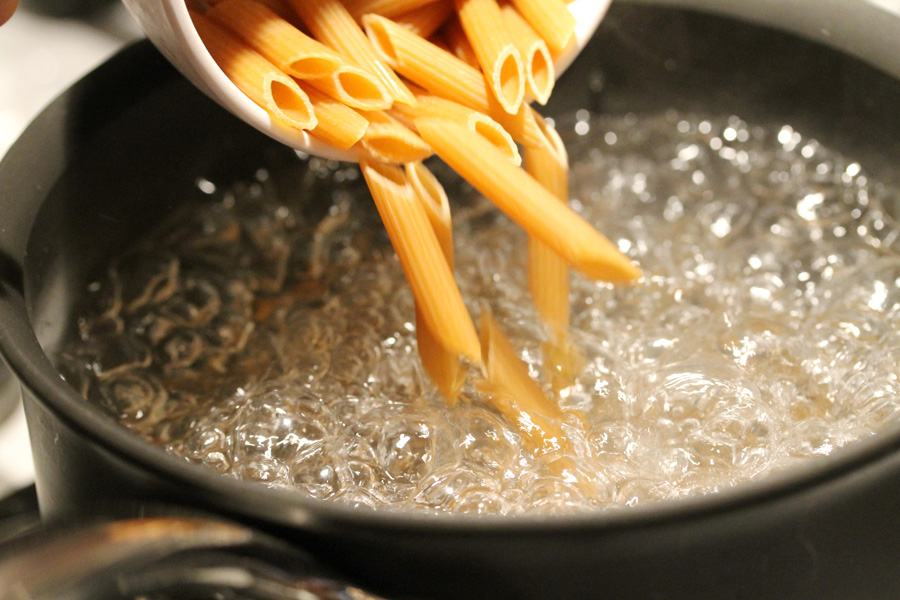
There are more efficient ways to cook pasta besides dropping it into a big pot of boiling, salted water. For example, next time pasta’s on the menu, try turning off the burner once you drop the pasta and letting it cook in the already-hot water.

The folks over at Cook’s Illustrated tried this method out with several different types of pasta including spaghetti, farfalle, shells, and ziti, and it worked like a charm. They explain why:

What Is Low-Temp Pasta?

Most instructions for cooking dried pasta are invariably the same: Drop the noodles into a pot of boiling water, bring it back to a boil, and keep it bubbling vigorously until the pasta is done. We already broke with this conventional wisdom by showing that you can cook pasta in a lot less water than is typically called for, as long as you don’t mind stirring it frequently.

Now we’ve learned that you don’t need to hold your pasta water at a rolling boil either. In fact, you don’t even need to keep the pot on the heat. The pasta will cook just fine if you take the pot off the burner as soon as you add the pasta, cover it immediately, stir once or twice during the first minute, cover again, and leave it to sit for the recommended cooking time. We tested this method with spaghetti, shells, farfalle, and ziti, using the full 4 quarts of water recommended per pound, and we found that the texture was identical to that of pasta we boiled the conventional way.

Here’s why the approach works: Starches absorb water at approximately 180 degrees. As long as the water is at a rolling boil (212 degrees) when you add the pasta and your kitchen is at normal room temperature, the water will remain well above 180 degrees off the heat for longer than the typical 8 to 10 minutes it takes for the pasta to cook through. In our tests, the water temperature had only cooled to about 195 degrees by the time the pasta was al dente. (In a cooler-than-normal kitchen, the pasta might take a minute or two longer to reach the proper texture, and the water temperature might drop a little more.)

Does this mean we’re going to stop boiling our pasta? Maybe not. But it’s nice to know we have the option.

Source…

 
via

How To Of The Day: Perfect Pie Dough

How to make perfect pie dough every time.

Enjoy!


When it comes to pie, the crust will make or break your baked treat. This video demonstrates three simple tricks you can use to ensure that your pie dough bakes into the perfect balance of chewy and flaky.

Baking a pie from scratch can be daunting, but in this video from the America’s Test Kitchen YouTube channel, chef Ashley Moore will show you how easy achieving the perfect pie crust really is. It all comes down to three easy tricks:

  1. Use a perfect balance of butter and shortening (you may have to tweak things to fit your preference).
  2. Put one cup of your recipe’s flour to the side. Mix the butter and shortening with the remaining flour, then mix in the cup you set aside afterward.
  3. Use vodka instead of water to avoid tough, leathery crust.

Vodka works so well because it’s comprised of 60% water and 40% ethanol, and less water means less gluten to toughen up your crust. Keep in mind, however, while most of the alcoholic content will burn off in the baking process, this still should be avoided if you have any alcohol allergies or intolerance. Use these tips and you’ll be ready to take on your holiday pies without fear.

Source…

Perfect Pie Dough
 

How To Of The Day: Baking A Perfect Thin-Crust Pizza

Andrew Janjigian explains how to simulate a pizzaiolo’s professional oven at home with this simple, but surprising, tip.

Enjoy!

With thin-crust pies, fast is best. The trick is a hot oven, as high as it goes, baking on an upper rack—heat rises, and it’s reflected back onto the top of the pie from the ceiling, to cook the toppings quickly too—and a good baking surface, like stone, or better yet, steel, which conducts heat better than ceramic stone.

Source…


Thin-Crust Pizza Dough Recipe

INGREDIENTS

3 cups (16 1/2 ounces) bread flour, plus more for work surface (see note)
2 tablespoons sugar
1/2 teaspoon instant or rapid-rise yeast
1 1/3 cups ice water (about 10 1/2 ounces) (see note)
1 tablespoon vegetable oil, plus more for work surface
1 1/2 teaspoons table salt

INSTRUCTIONS
1. In food processor fitted with metal blade, process flour, sugar, and yeast until combined, about 2 seconds. With machine running, slowly add water through feed tube; process until dough is just combined and no dry flour remains, about 10 seconds. Let dough stand 10 minutes.

2. Add oil and salt to dough and process until dough forms satiny, sticky ball that clears sides of workbowl, 30 to 60 seconds. Remove dough from bowl and knead briefly on lightly oiled countertop until smooth, about 1 minute. Shape dough into tight ball and place in large, lightly oiled bowl. Cover tightly with plastic wrap and refrigerate for at least 24 hours and up to 3 days.

Source…


Load More